
Setting up EmailJS with a React App
A step-by-step guide to sending form data as an email with EmailJS and React


In this tutorial, we will walk through the steps of setting up EmailJS with a React app. EmailJS is a service that allows you to send and receive emails without the need for a backend, and it's free to use for up to 200 emails per month. With EmailJS and React, you can easily create a contact form that delivers emails to your inbox.
To follow along with this tutorial, you should have a basic understanding of JavaScript and React. We will cover the following steps:
Setting up EmailJS
Setting up the React code
Building the contact form.
Adding form submit logic
Let's get started!
Step1: Setting Up EmailJS
Let's start by signing up on the website.
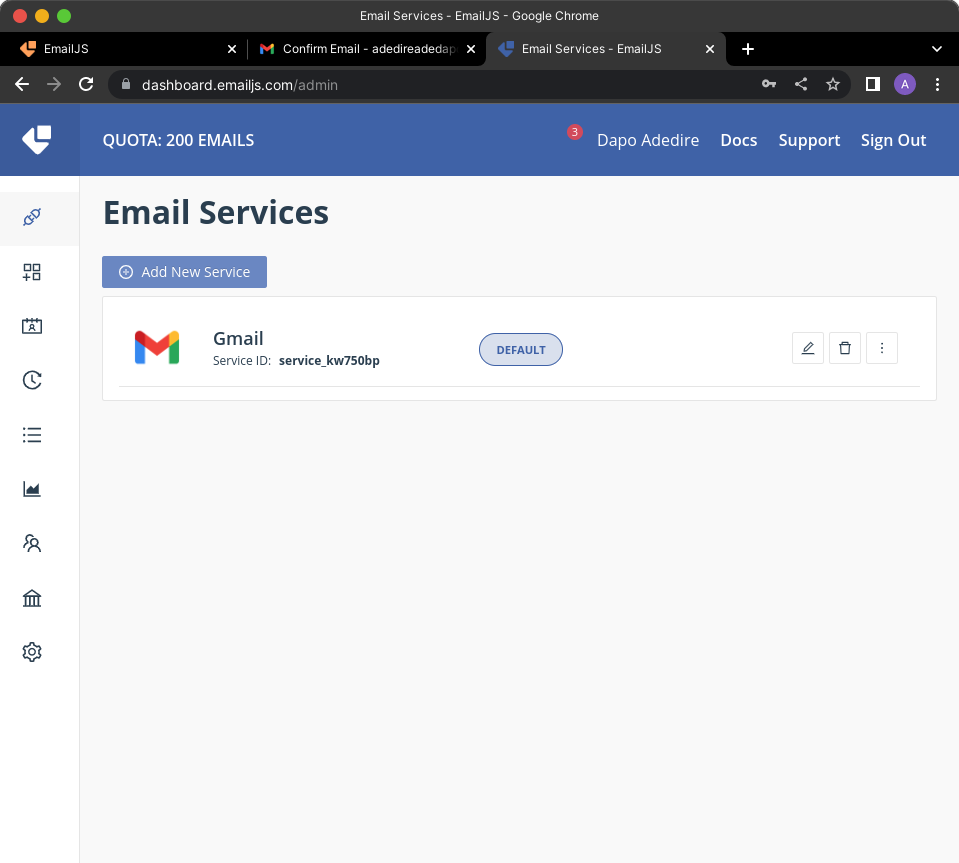
After signing in successfully, the next step is to set up a new email service. In this article, we will use Gmail.
Your dashboard should look like this after successfully setting up a service.
Go to the Templates tab and create a new template. This template will determine how the email appears in your inbox. Replace the default template with your desired format and include placeholders such as "{{message}}", "{{from_name}}", and "{{from_email}}". These placeholders should match the name attributes of the input fields in your React form.
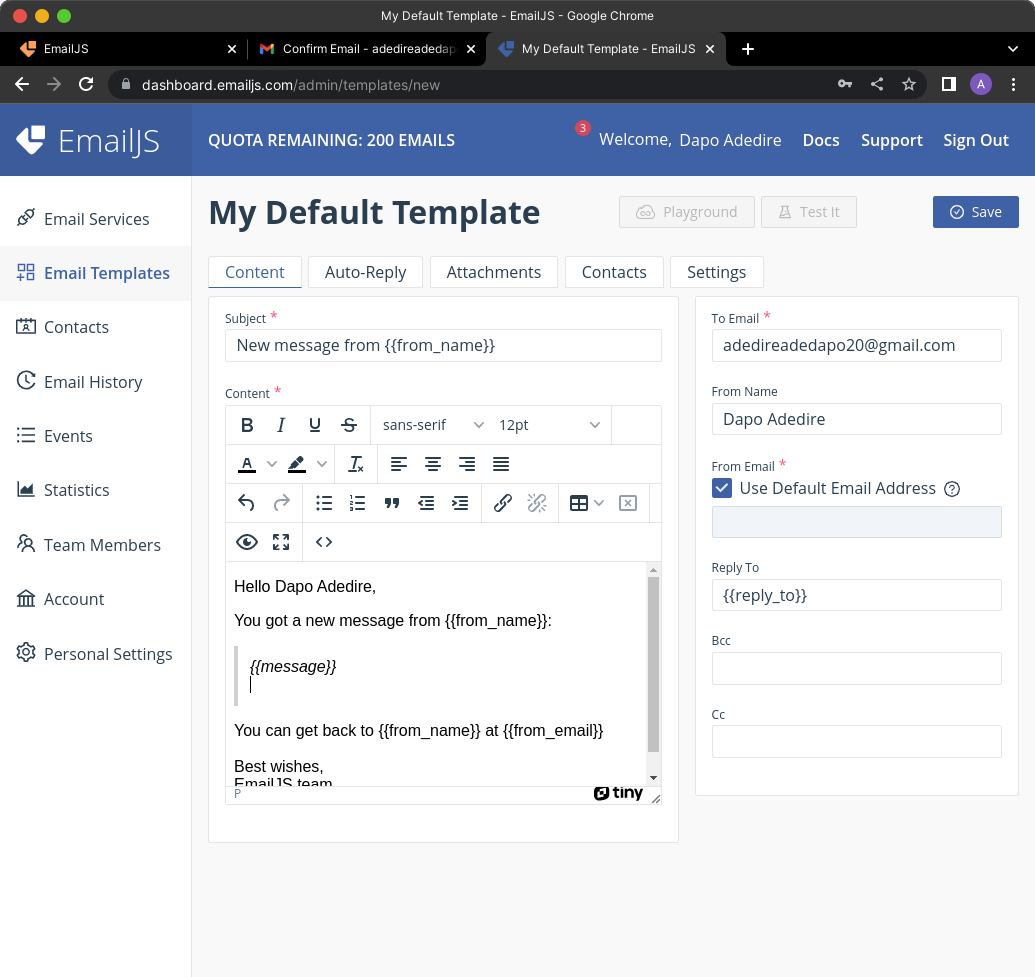
Before saving the template, go to the Settings tab in the Templates section and copy the Template ID. This ID will be used in the React code to specify which template to use when sending the email.
Save the template and proceed to the next step.
Step 2: Setting up the React code.
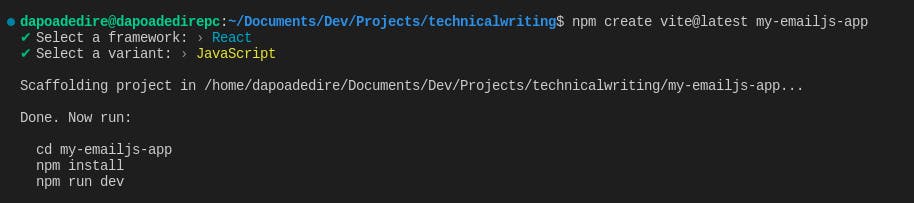
In this tutorial, we're going to use Vite + React, so go to your terminal and run:
npm create vite@latest my-emailjs-app
The name of the app is emailjs-app and we will React-Javascript.
In the app directory, install the `@emailjs/browser` library.
npm i @emailjs/browser
Step 3: Building the Contact Form
Create a `ContactForm.jsx` file. This is where you will include the code to send the form data as an email.
Go to https://www.emailjs.com/docs/examples/reactjs/ and copy the template created for us to send the email.
After copying, replace the config variables from what we have from our EmailJS Dashboard.
import React, { useRef } from 'react';
import emailjs from '@emailjs/browser';

export const ContactUs = () => {
  const form = useRef();

  const sendEmail = (e) => {
    e.preventDefault();

    emailjs.sendForm('YOUR_SERVICE_ID', 'YOUR_TEMPLATE_ID', form.current, 'YOUR_PUBLIC_KEY')
      .then((result) => {
          console.log(result.text);
      }, (error) => {
          console.log(error.text);
      });
  };

  return (
    <form ref={form} onSubmit={sendEmail}>
      <label>Name</label>
      <input type="text" name="user_name" />
      <label>Email</label>
      <input type="email" name="user_email" />
      <label>Message</label>
      <textarea name="message" />
      <input type="submit" value="Send" />
    </form>
  );
};
I'm simply going to explain what the template does:
The code defines a ContactUs React component that renders a form with three fields: "Name," "Email," and "Message." When the form is submitted, the sendEmail function is called with the submit event as an argument.
The sendEmail function uses the emailjs library to send an email. It calls the sendForm method, which sends an email using a specified EmailJS service, template, and form element. It also passes a public key as an argument. The sendForm method returns a promise that resolves with the result of the email sending attempt if it was successful, or it rejects with the error if it was not.
The sendForm method takes four arguments:
YOUR_SERVICE_ID: This is a string that represents the ID of the EmailJS service that you want to use to send the email. This service must be defined in your EmailJS account.YOUR_TEMPLATE_ID: This is a string that represents the ID of the EmailJS template that you want to use to send the email. This template must be defined in your EmailJS account and associated with the service.form.current: This is a reference to the form element that is being submitted. TheuseRefhook is used to create this reference and assign it to theformvariable.YOUR_PUBLIC_KEY: This is a string that represents the public key for your EmailJS account. It is used to authenticate thesendFormrequest.
Next step is to call the component in the App.jsx file. Currently, this is the contact of the App.jsx file.
    import { useState } from 'react'
    import reactLogo from './assets/react.svg'
    import './App.css'

    function App() {
      const [count, setCount] = useState(0)

      return (
        <div className="App">
          <div>
            <a href="https://vitejs.dev" target="_blank">
              <img src="/vite.svg" className="logo" alt="Vite logo" />
            </a>
            <a href="https://reactjs.org" target="_blank">
              <img src={reactLogo} className="logo react" alt="React logo" />
            </a>
          </div>
          <h1>Vite + React</h1>
          <div className="card">
            <button onClick={() => setCount((count) => count + 1)}>
              count is {count}
            </button>
            <p>
              Edit <code>src/App.jsx</code> and save to test HMR
            </p>
          </div>
          <p className="read-the-docs">
            Click on the Vite and React logos to learn more
          </p>
        </div>
      )
    }

    export default App
We will erase it, then import and call the ContactUs.jsx component.
Now, it should look like this.
    import './App.css'
    import { ContactUs } from './ContactForm'

    function App() {
      return (
       <ContactUs />
      )
    }

    export default App
We're getting there.
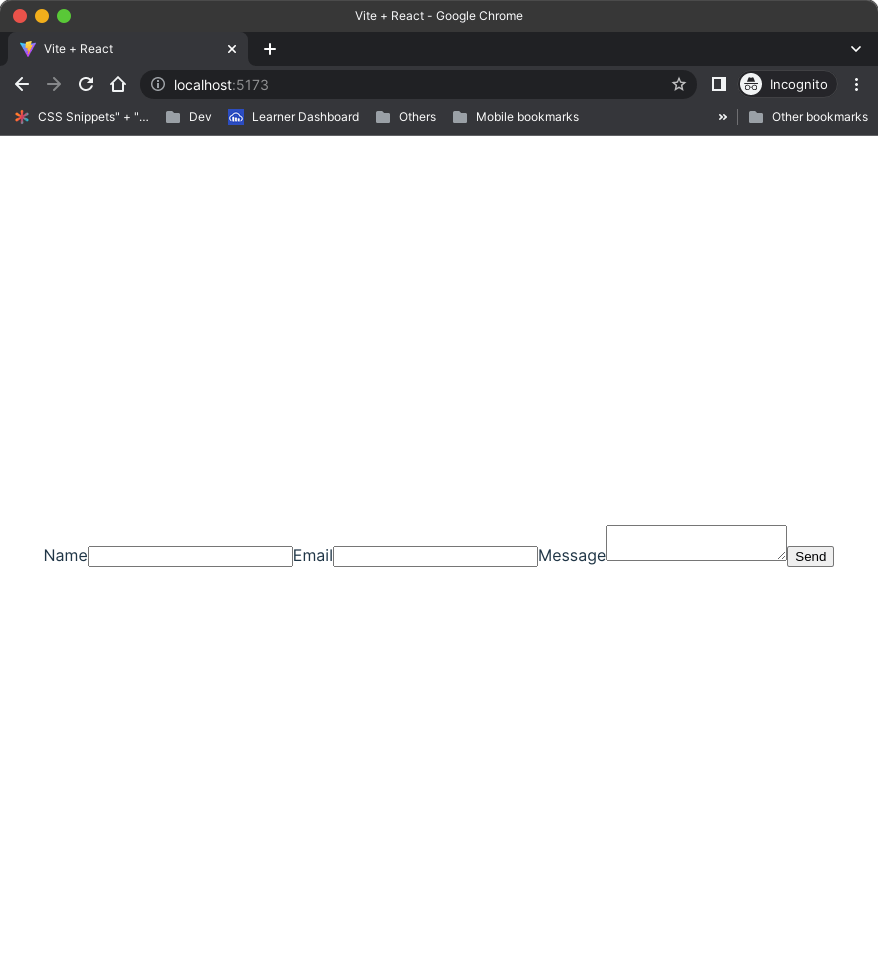
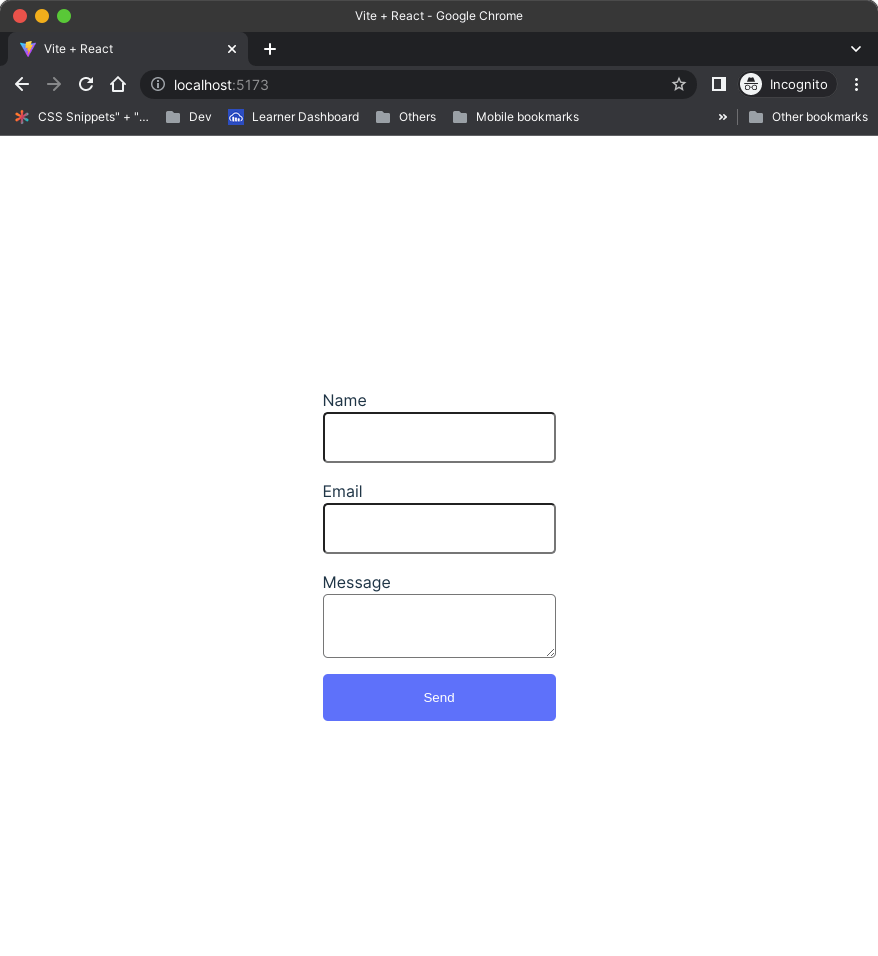
If you run the app with npm run dev now, this is what you'll see on your screen.
Let's add some CSS code to the index.css file to make it look elegant.
    form{
      display: flex;
      flex-direction: column;
    }

    input{
      padding: 1rem;
      border-radius: 5px;
    }

    textarea{
      padding: 1rem;
      border-radius: 5px;
    }

    input[type="submit"]{
      margin-top: 1rem;
      padding: 1rem;
      background-color: #646cff;
      color: white;
      border: none;
      border-radius: 5px;
      cursor: pointer;
    }

    label{
      margin-top: 1rem;
      align-self: flex-start;
    }
I think this looks better.
Now we need to go back to The ContactForm Component and fill in these details into the sendForm function.
- YOUR_PUBLIC_KEY
- YOUR_TEMPLATE_ID
- YOUR_SERVICE_ID
Also, we need to make sure the name of the input tags matches what we have in our template.
You can check the template dashboard to verify.
Also, in the return statement of the ContactUs component, change the user_name and user_name to from_name and from_email respectively. This is to ensure the name attribute matches the corresponding placeholder in the EmailJS template.
    import React, { useRef } from 'react';
    import emailjs from '@emailjs/browser';


    const YOUR_SERVICE_ID = "**************"
    const YOUR_TEMPLATE_ID = "**************"
    const YOUR_PUBLIC_KEY = "***************"


    export const ContactUs = () => {
        const form = useRef();

        const sendEmail = (e) => {
            e.preventDefault();

            emailjs.sendForm(YOUR_SERVICE_ID, YOUR_TEMPLATE_ID, form.current, YOUR_PUBLIC_KEY)
                .then((result) => {
                    console.log(result.text);
                }, (error) => {
                    console.log(error.text);
                });
        };

        return (
            <form ref={form} onSubmit={sendEmail}>
                <label>Name</label>
                <input type="text" name="from_name" />
                <label>Email</label>
                <input type="email" name="from_email" />
                <label>Message</label>
                <textarea name="message" />
                <input type="submit" value="Send" />
            </form>
        );
    };
Now, let's try to send the form.
Step 4: Adding Form Submit Logic.
If you look at the screenshots, you'd notice the email gets sent and the recepient has received it, there is not status alert whatsoever for the user, I was only able to see it in the console, so we need to improvise our code to handle the form status.
To do this, we'll use a useState hook to handle the logic.
    import React, { useRef } from 'react';
    import emailjs from '@emailjs/browser';


    const YOUR_SERVICE_ID = "service_kw750bp"
    const YOUR_TEMPLATE_ID = "template_c5gxkyf"
    const YOUR_PUBLIC_KEY = "KMvmtYAfHOlj97U6M"


    export const ContactUs = () => {
        const form = useRef();
        const [status, setStatus] = useState(null); /*New change */
        const sendEmail = (e) => {
            e.preventDefault();
            setStatus("sending"); /*New change */

            emailjs.sendForm(YOUR_SERVICE_ID, YOUR_TEMPLATE_ID, form.current, YOUR_PUBLIC_KEY)
                .then((result) => {
                    console.log(result.text);
                    setStatus("sent");  /*New change */
                }, (error) => {
                    console.log(error.text);
                    setStatus("error"); /*New change */
                });
        };

        return (
            <>
                <form ref={form} onSubmit={sendEmail}>
                    <label>Name</label>
                    <input type="text" name="from_name" />
                    <label>Email</label>
                    <input type="email" name="from_email" />
                    <label>Message</label>
                    <textarea name="message" />
                    <input type="submit" value="Send" />
                </form>

    /*New changes */
                {status === "sending" && (
                    <div style={{ color: "blue" }}>sending...</div>
                    )
                }
                {status === "sent" && (
                    <div style={{ color: "green" }}>Message sent!</div>
                )
                }
                {status === "error" && (
                    <div style={{ color: "red" }}>Message failed to send.</div>
                )

                }
    /*New changes */
            </>
        );
    };
Here is what I did.
I added a useStateHook.
The useState hook takes a single argument, which is the initial state of the state variable. In this case, the initial state of status is null.
useState returns an array with two elements: the current state value and a function that can be used to update the state value. In this code, the destructuring assignment syntax is being used to assign these two elements to the variables status and setStatus, respectively.
The status variable holds the current value of the status state, and the setStatus function can be used to update the value of the status state. For example, setStatus("sending") sets the value of the status state to "sending".
The status state is used in the JSX returned by the ContactUs component to conditionally render different elements based on the value of status. When the form is being submitted, the value of status is set to "sending". When the form submission is successful, the value of status is set to "sent". And if there is an error, the value of status is set to "error".
With these steps, you should now have a functional contact form in your React app that uses EmailJS to send the form data as an email. When the form is submitted, the email will be sent according to the template you defined in EmailJS and the input fields in the form will be replaced with the corresponding placeholders.
You can find the full code for this article in this Github Repository.

Thank you for following along with this tutorial! If you found it helpful, please consider liking, commenting, and sharing it with others.